Oct 15, 2025
Fluxon UI is a commercial collection of web UI components for Phoenix LiveView projects written by Andriel Nuernberg. It only came out this year and I recently bought a license. Though there is great documentation I missed an example starter project to help in converting to it. After some experimentation, I created such a project, named fluxonui_first.
There are two goals: to give you something that works out of the box and to show you the detailed steps that led to it. The source code is available on GitHub in the fluxonui_first repository.
As Fluxon UI is a commercial framework, you will need to buy a license and install its hex repo so that it shows up when you type mix hex.repo list.
The fluxonui_first project itself if very simple. phx.gen was used to create the project itself, add authentication and a simple todo list resource.
There are less than 10 commits that show exactly what changed. Some commits are the result of automatically generated code that was checked in as is. The other commits show the modifications to adapt to Fluxon UI.
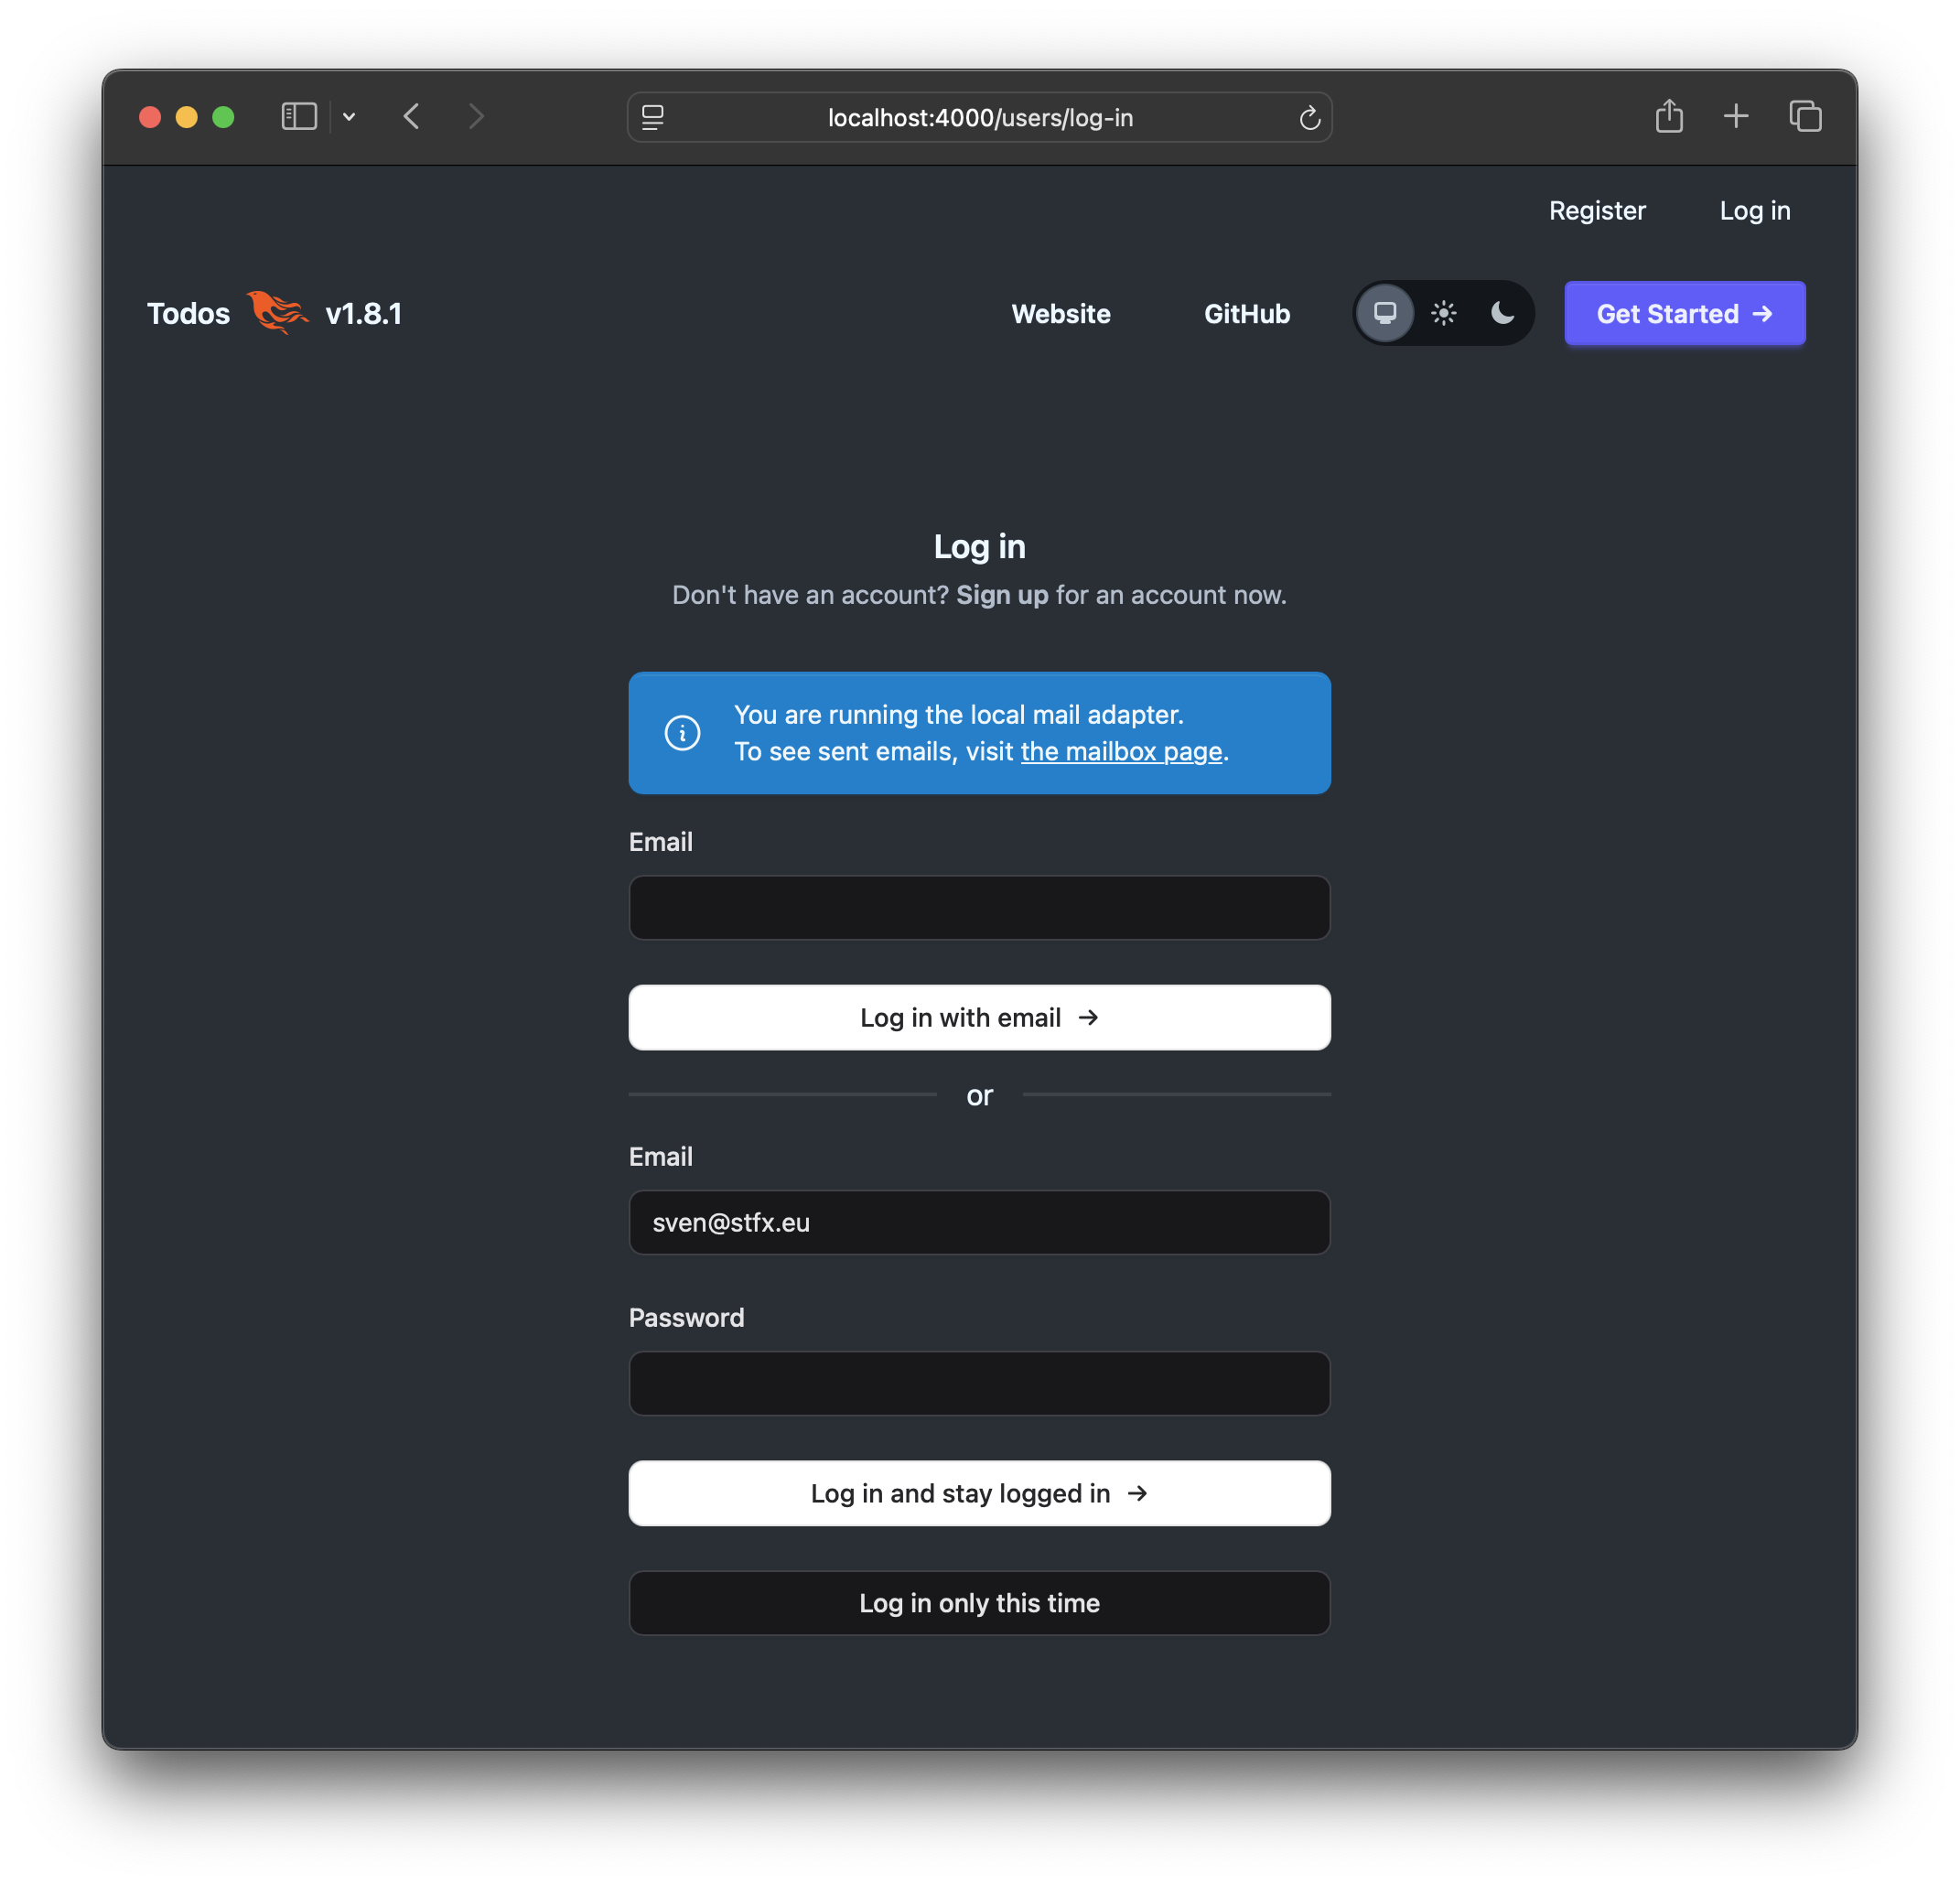
The login screen and the other screens related to authentication look basically the same, though they are using enhanced implementations of .button and .input functional components.
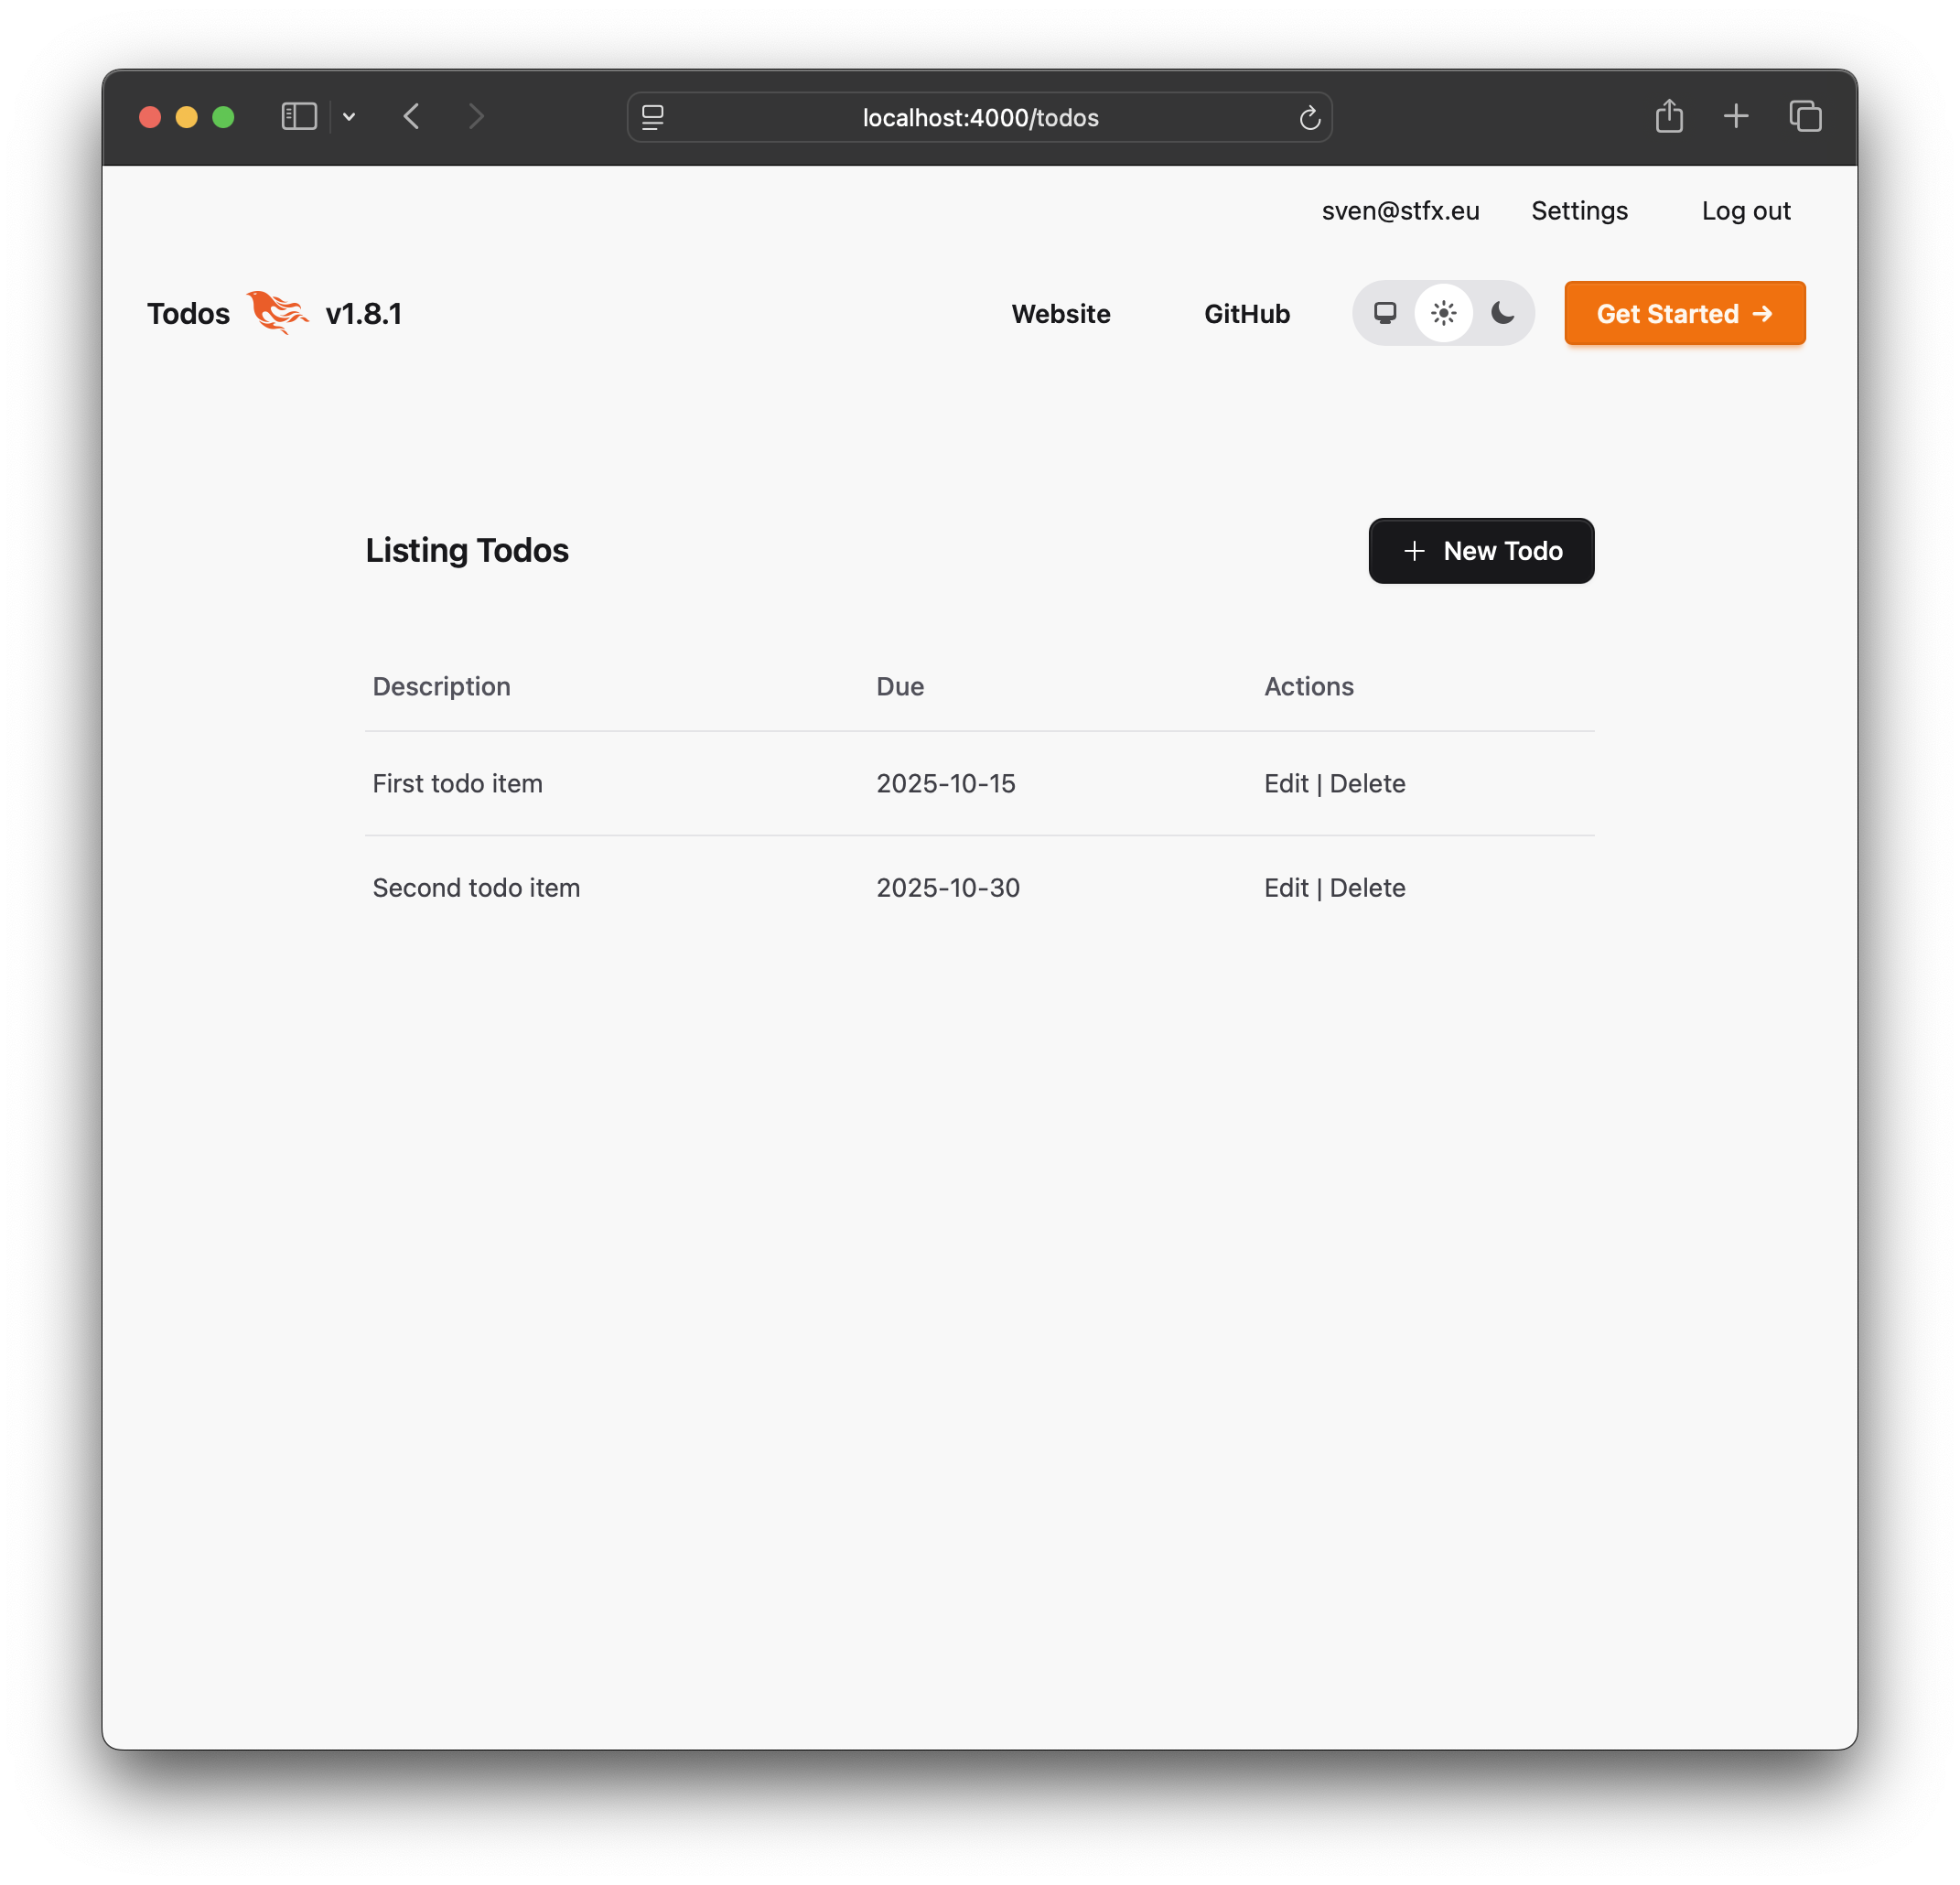
The .table and its subelements, .table_head, .table_body and .table_row, are quite different in use, though not necessarily more difficult to work with (see the table documentation). Here is the adapted code of the render/1 of FluxonUIFirstWeb.TodoLive.Index.
defmodule FluxonUIFirstWeb.TodoLive.Index do
  use FluxonUIFirstWeb, :live_view

  alias FluxonUIFirst.Todos

  @impl true
  def render(assigns) do
    ~H"""
    <Layouts.app flash={@flash} current_scope={@current_scope}>
      <.header>
        Listing Todos
        <:actions>
          <.button variant="solid" navigate={~p"/todos/new"}>
            <.icon name="hero-plus" /> New Todo
          </.button>
        </:actions>
      </.header>

      <.table id="todos">
        <.table_head>
          <:col>Description</:col>
          <:col>Due</:col>
          <:col>Actions</:col>
        </.table_head>
        <.table_body>
          <.table_row
            :for={{id, todo} <- @streams.todos}
            id={"##{id}"}
            phx-click={JS.navigate(~p"/todos/#{todo}")}
            class="cursor-pointer hover:bg-accent/50"
          >
            <:cell>{todo.description}</:cell>
            <:cell>{todo.due}</:cell>
            <:cell>
              <div class="sr-only">
                <.link navigate={~p"/todos/#{todo}"}>Show</.link> |
              </div>
              <.link navigate={~p"/todos/#{todo}/edit"}>Edit</.link>
              |
              <.link
                phx-click={JS.push("delete", value: %{id: todo.id}) |> hide("##{id}")}
                data-confirm="Are you sure?"
              >
                Delete
              </.link>
            </:cell>
          </.table_row>
        </.table_body>
      </.table>
    </Layouts.app>
    """
  end
end
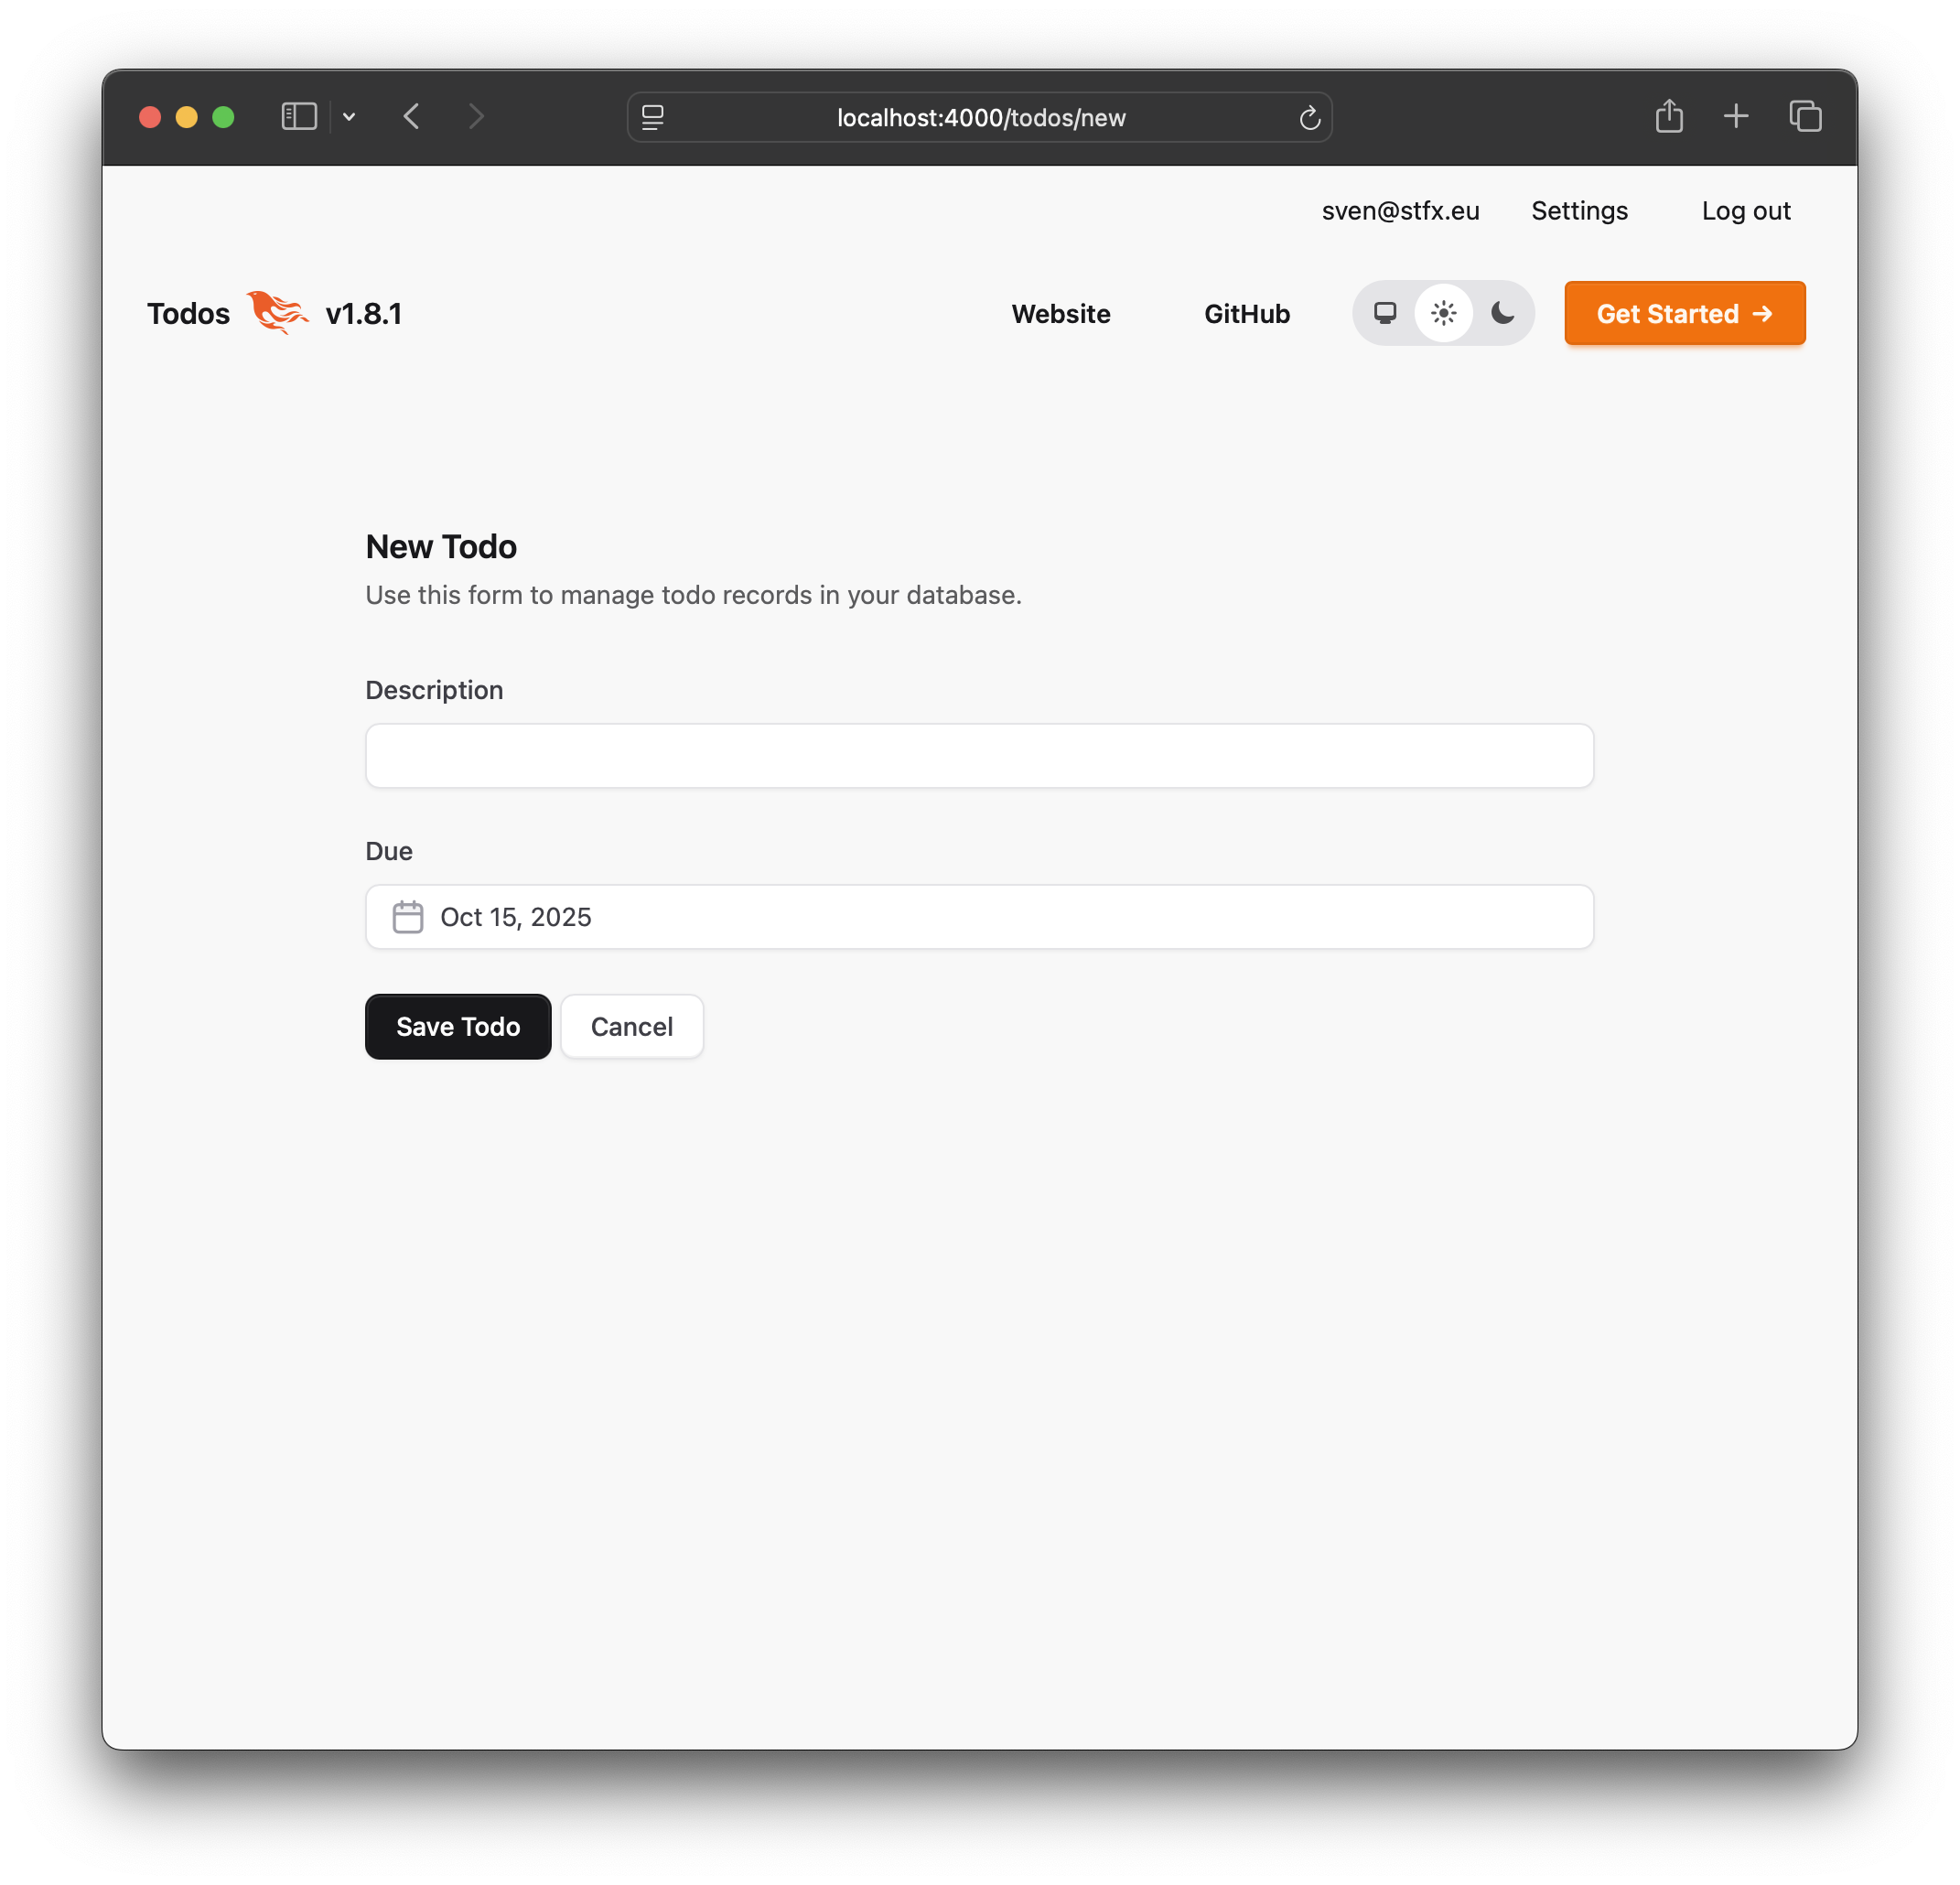
The form to create or edit Todo items works as expected. Though there are more advanced options that are not used here.
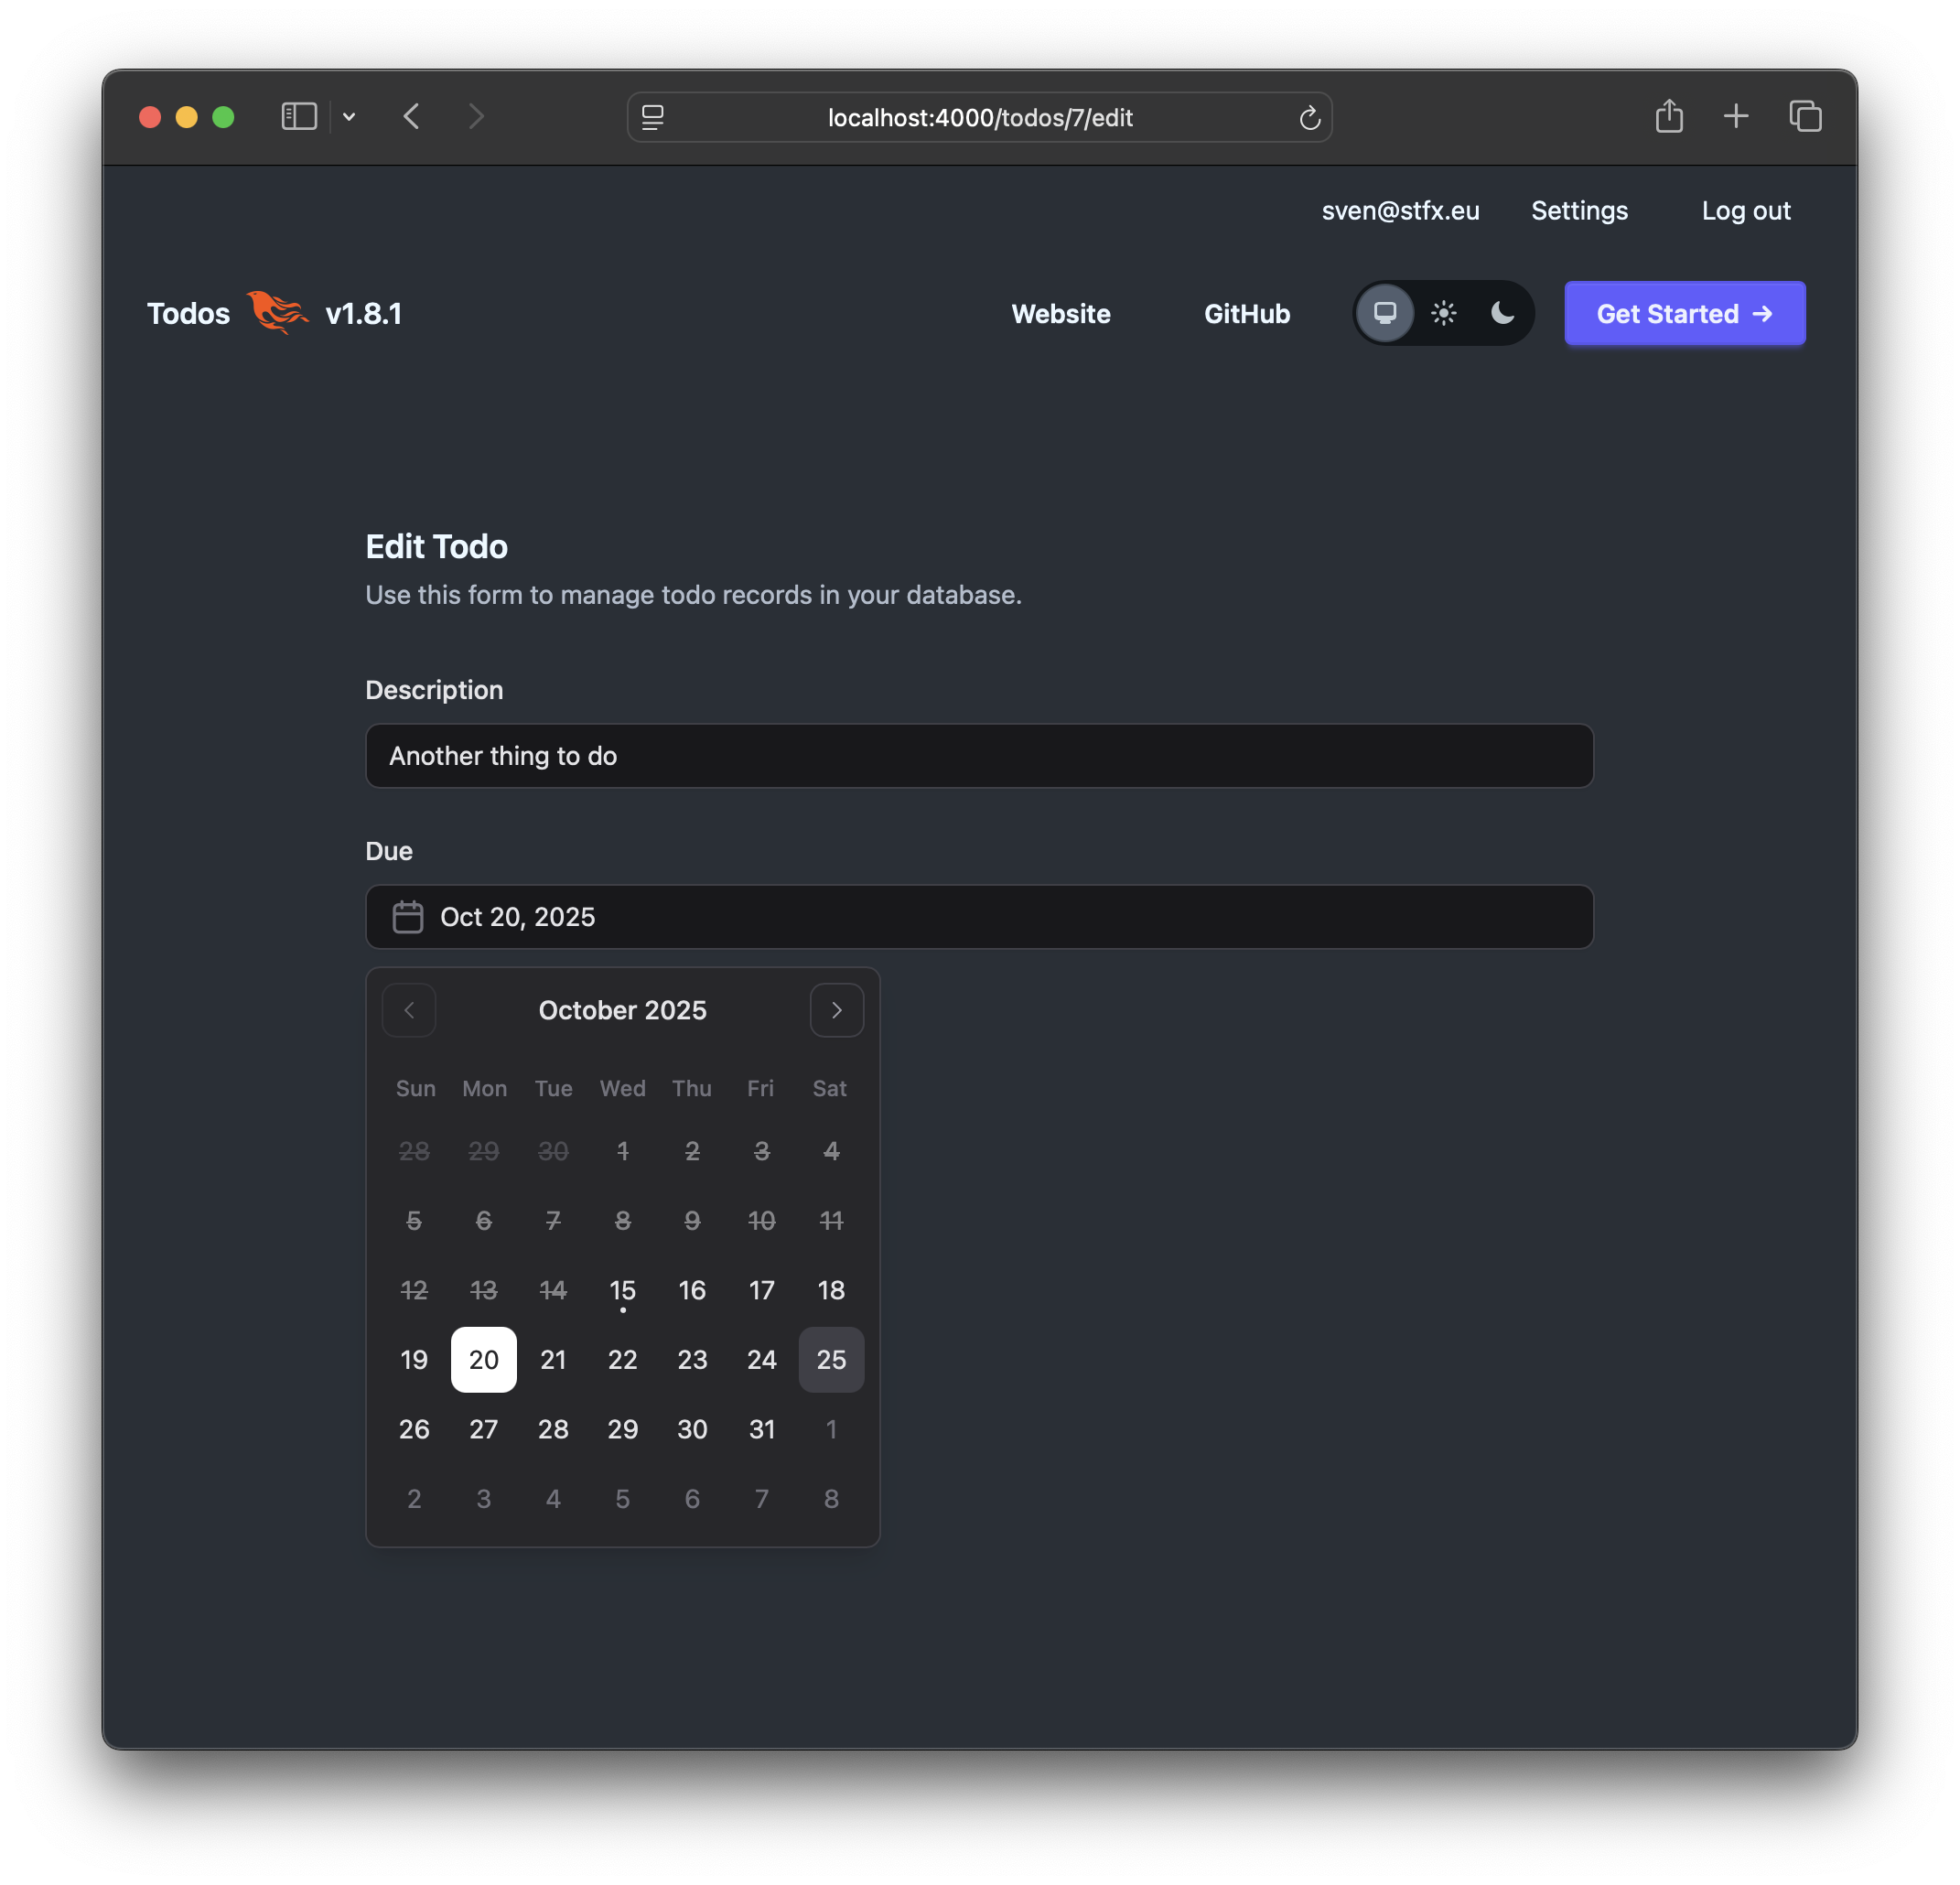
For the date input, I used Fluxon UI’s much more advanced date picker, one of a family which also includes date range and date time pickers. Here is the code of the render/1 of FluxonUIFirstWeb.TodoLive.Form.
defmodule FluxonUIFirstWeb.TodoLive.Form do
  use FluxonUIFirstWeb, :live_view

  alias FluxonUIFirst.Todos
  alias FluxonUIFirst.Todos.Todo

  @impl true
  def render(assigns) do
    ~H"""
    <Layouts.app flash={@flash} current_scope={@current_scope}>
      <.header>
        {@page_title}
        <:subtitle>Use this form to manage todo records in your database.</:subtitle>
      </.header>

      <.form for={@form} id="todo-form" phx-change="validate" phx-submit="save">
        <div class="space-y-6">
          <.input field={@form[:description]} type="text" label="Description" />
          <.date_picker field={@form[:due]} label="Due" min={Date.utc_today()} />
          <footer>
            <.button phx-disable-with="Saving..." variant="solid">Save Todo</.button>
            <.button navigate={return_path(@current_scope, @return_to, @todo)}>Cancel</.button>
          </footer>
        </div>
      </.form>
    </Layouts.app>
    """
  end
end
Note how elegantly the .date_picker replaces a date input. Just one of its options is used here: to prevent dates in the past.
These are the steps and corresponding commits of the fluxonui_first repository.
To run this project from scratch under development, the following standard steps should be sufficient (provided Fluxon UI is installed as hex.repo and PostgreSQL is present and locally accessible without password).
$ git clone https://github.com/svenvc/fluxonui_first.git
$ cd fluxonui_first
$ mix setup
$ iex -S mix phx.server
Finally visit http://localhost:4000, register via fake email, confirm via the login link sent to the fake mailbox http://localhost:4000/dev/mailbox/.